Setup authentication with any identity provider
Authress Authentication works as identity aggregation. This means that it provides a central point to combine any number of user identity management or federated login providers in a single place. For example Google and Office 365 login. Providing a solution that works with just one is easy, but to support both and then normalize the data, this becomes more complex.
Authress normalizes these providing standard OIDC complaint JWTs which includes secure session management.
Setting up authentication requires the following parts:
- Provider specific OAuth configuration
- New application setup
- User login flow
- Service API token verification
- [Going further] Custom Domain
Identity provider configuration
See Preconfigured Login connections for details on how to set up Login with Google or other common providers
Most connections already have pre-configured Authress defaults, such as Google. You can see the list of default available in the Authress Management Portal.
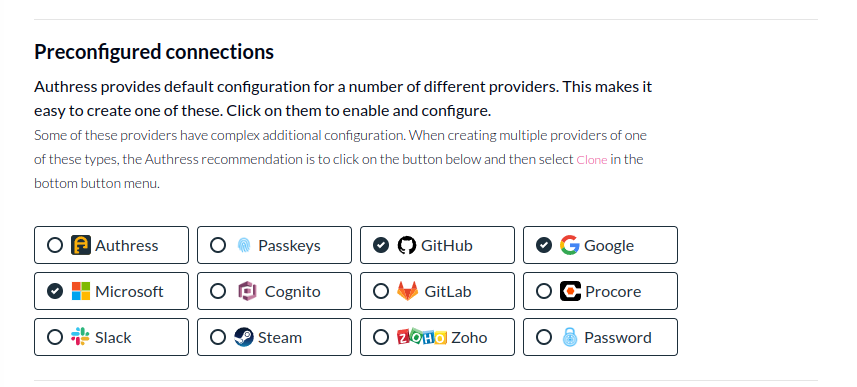
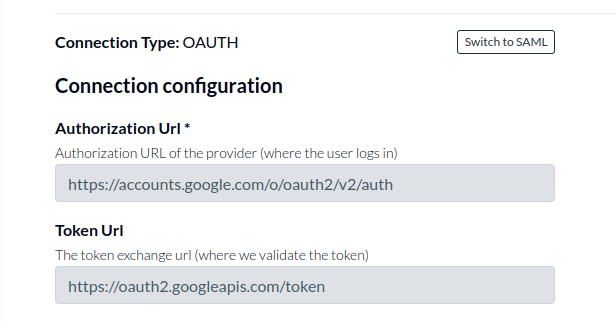
These already have the important configuration configured. In other cases, additional information might be required, such as:
- Specifying Authorization URL (example: https://accounts.google.com/o/oauth2/v2/auth)
- Specifying the token URL (example: https://oauth2.googleapis.com/token)
This information can be specified in the Identity connections in the Authress Management Portal.
New application setup
For a user to login you'll need to configure an Identity connection and an Application.
- The Identity connection is where the user's identity is, think Google, Microsoft, Github, etc... It is the
From. - Authress is the aggregator that combines these identities
- The Application is where the user is navigating to. This is your UI, software, application, or app. It is the
To.
A provider connection creates the user’s identity, and applications consume them. Connecting applications allows them to consume credentials. To prevent compromised user credentials, only listed applications are allowed to connect to your providers. So we'll go through the flow to create a new application:
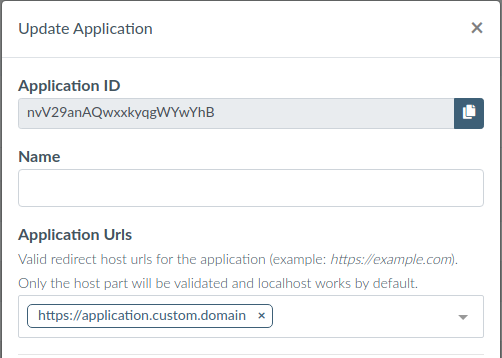
Follow the instructions in the Authress Management Portal to Create an new application.
Specify an internal name for the application and the allowed domains for the application to run. Only these fully-qualified domain names will be allowed to use your connections. More specifically these applications must have top level domains that match your custom domain that you created.
User login flow
With the identity provider and application configuration in place, your website app can configure the login experience you want.
- Install the site Authress Login SDK javascript package for managing user credentials:
npm install @authress/login
Once it is installed we cane configure it in your application. Since we want users to be able to select which connection they want, we can them a branded Google Login Button. When users click the Login with Google button call the authenticate() method in the library:
import { LoginClient } from '@authress/login';
const loginClient = new LoginClient({
  // Both of these properties can be found and configured at:
  // https://authress.io/app/#/manage?focus=applications
  authressApiUrl: 'https://auth.yourdomain.com',
  applicationId: 'YOUR_APPLICATION_ID'
});

// This will redirect the user to the specified connection login UI,
// track their session with Authress, and then redirect back to your specified
// redirectUrl. By default we redirect users back to where they started,
// however, usually you’ll want to specify the next location they should go.
await loginClient.authenticate({
  connectionId: 'SELECTED_CONNECTION_ID', redirectUrl: window.location.href
});
Later after the user has already logged in with can validate that they have a valid session and fetch the access token to use with your APIs:
// Once the user returns to your site, you’ll want to get the necessary credentials.
// These should always be fetched by using the token getter:
const userToken = await loginClient.ensureToken();

// The full flow is
// 1. Check if the user is logged in on every page.
//     * If not, redirect them to the login page, a route guard is standard.
//     * If there are credentials, get the token => Done.
// 2. Ask the user to select connection/provider, call authenticate
// 3. Get the token from the SDK when you need it
//     * and pass it in the Authorization header in HTTP API requests.

const isUserLoggedIn = await loginClient.userSessionExists();
if (!isUserLoggedIn) {
  window.location.assign('/login');
} else {
  const userToken = await loginClient.ensureToken();
}

// If route === 'Login'
await loginClient.authenticate({
  connectionId: 'SELECTED_CONNECTION_ID', redirectUrl: window.location.href
});

// After redirect, same check, but now we'll have the token.
const isUserLoggedIn = await loginClient.userSessionExists();
if (!isUserLoggedIn) {
  window.location.assign('/login');
} else {
  const userToken = await loginClient.ensureToken();
}
Service API token verification
The site is now successfully sending tokens from your website to your service API, but the service needs to verify those tokens are valid. The easiest way to do this is send the tokens to the Authress Authorization apis, as Authress will automatically verify the tokens or return back a 401. However, it can be more secure (and faster) to verify the tokens on the service side, on every API request verify the user token before continuing.
To do this use the AuthressClient.verifyToken() in the authress-sdk service package:
npm install @authress/sdk
[Going Further] Custom Domain
- Prerequisite: You need access to your DNS provider
After getting your first application working, it would be time to publish it with your domain. For security reasons every Authress tenant operates on a unique subdomain of your product’s domain. While localhost testing works out of the box, to deploy it to the domain, a custom subdomain needs to be configured. You will need to have access to your domain’s CNAME records to add the relevant ones necessary for Authress. These are required to alias to our authentication server and create a certificate restricted to the relevant domain. Once you have access to your DNS provider’s zone, follow the instructions for setting up a custom domain.
import { AuthressClient } from '@authress/sdk';


// Specify your custom domain for tokens.
// Configurable at https://authress.io/app/#/manage?focus=applications
const authressCustomDomain = 'https://auth.yourdomain.com';
const authressClient = new AuthressClient({ authressApiUrl: authressCustomDomain });

async function authMiddleware(request) {
  try {
    // Grab authorization cookie from the request
    const userToken = request.headers.Authorization.split(' ')[1];
    const userIdentity = await authressClient.verifyToken(userToken);
    return userIdentity;
  } catch (error) {
    console.log('User is unauthorized', error);
    throw { statusCode: 401 };
  }
}
Non standard OAuth configuration
Some OAuth providers do not use JWTs or don't follow RFC standards for access tokens exchange. For examples and errors on how to set these up, check out OAuth setup guide - part 2.