Setup user authentication using Microsoft Entra
This article provides a quick start guide for adding Microsoft Login to Authress. This enables your users to login using Azure AD (Entra), Outlook, Microsoft AD, MS Live, XBox, and any other Microsoft corporate identity provider and authenticate into your software.
If you are looking to enable admin login access into the Authress Management Portal using your corporate IdP see the Authress Management Portal SSO Configuration.
In this guide we’ll set up Microsoft login. the Login with Microsoft OAuth configuration is in Azure. Setting up authentication requires the following parts:
- Authress-Microsoft OAuth configuration
- Azure Marketplace App Registration
- Testing the configuration
Prerequisite: Azure Development Account
In order to enable your users to log in with Microsoft AD, Outlook, or any of the above listed providers, you will need an Azure developer account. You can do that by Registering for an Azure account.
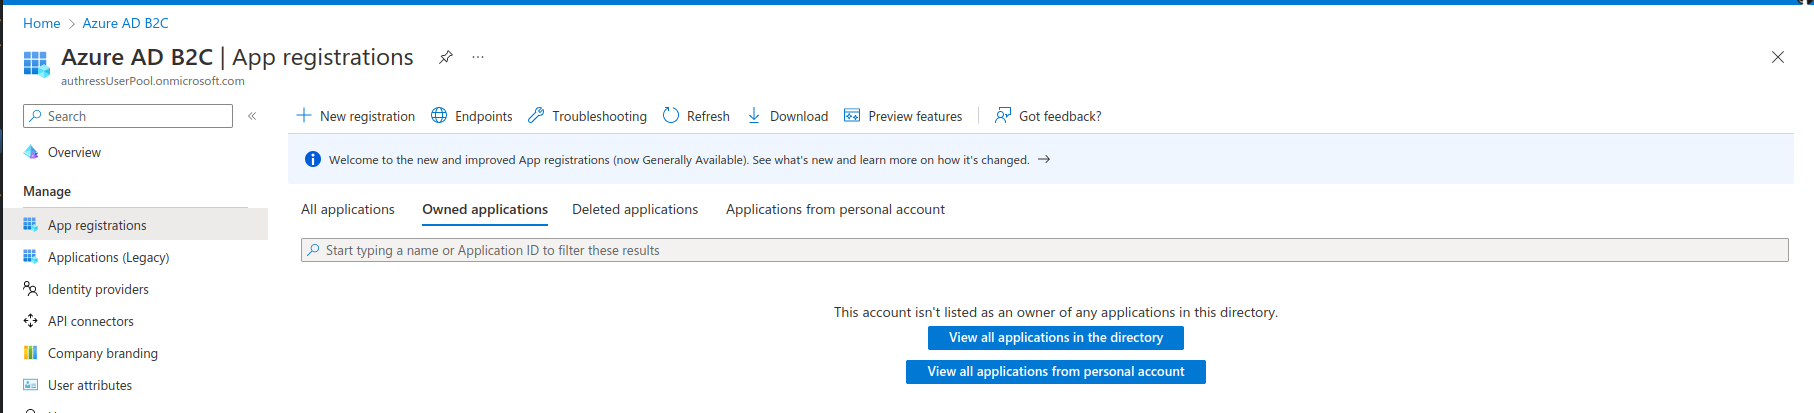
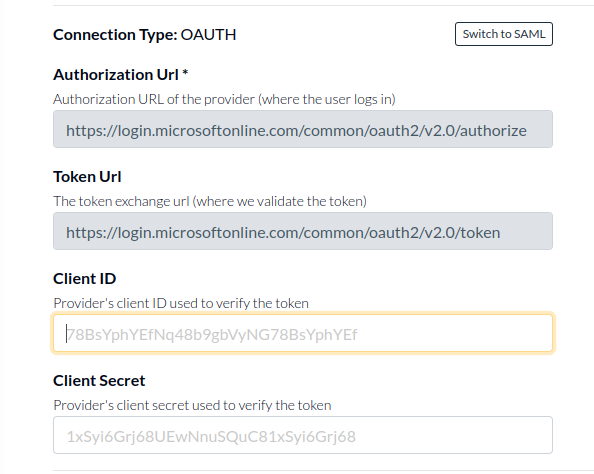
Authress Connection configuration
The first step is enabling the Microsoft preconfigured Authress connection in the Authress Management Portal.

You will see there are the missing fields Client ID and Client Secret, first we are going to get the Client ID.
Azure App Registration
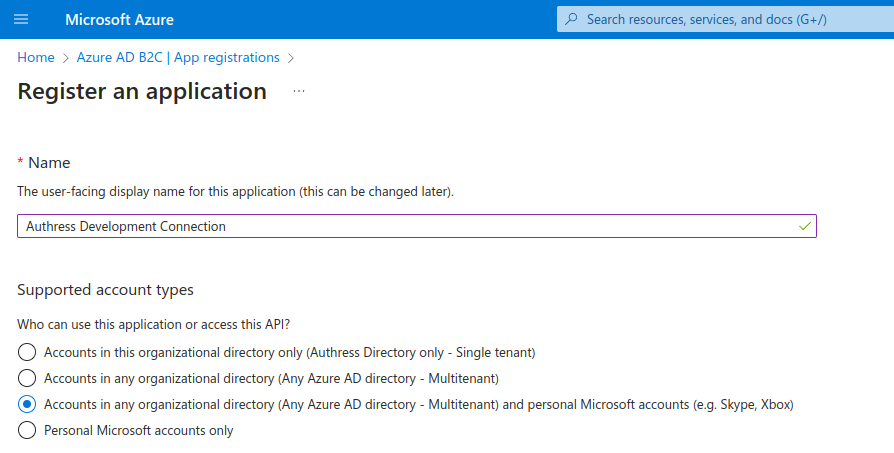
Now we can create a new App Registration. This App Registration is what your users will see when the choose to sign in with Microsoft.
Navigate to the Azure Portal and choose to create a new App Registration. Click App registrations > then click New registration.
Or click here: Create App registration
Enter a Name and make sure to select the appropriate Supported account types. Authress recommends:
Accounts in any organizational directory (Any Entra/Azure AD directory - Multitenant) and personal Microsoft accounts (e.g. Skype, Xbox)
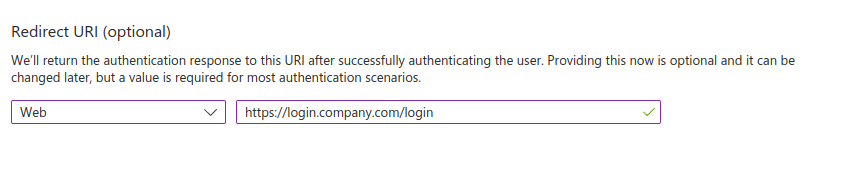
- Set the
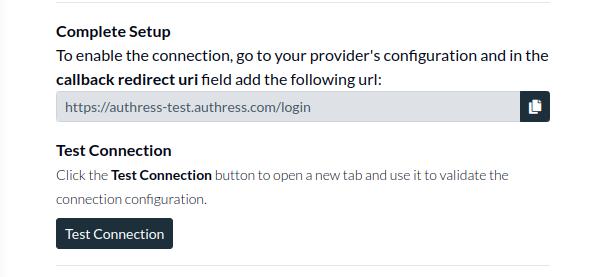
Redirect URIto be your Authress Custom Domain url. This is the domain you set up in your Authress account. We'll assume for this example it ishttps://auth.yourdomain.comand therefore the redirect URI ishttps://auth.yourdomain.com/login. And then click Register. This value is available in your new Authress Connection for Microsoft in theComplete Setupsection of the connection.
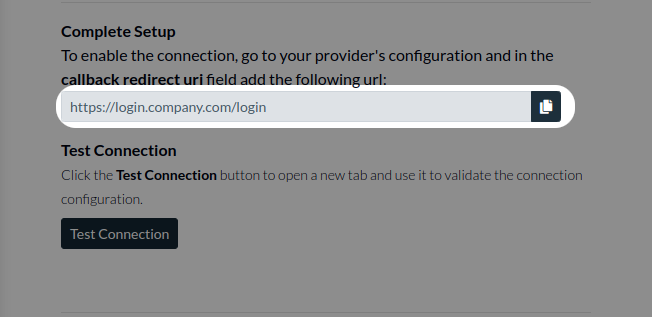
And then copy this value to the App Registration in Azure:
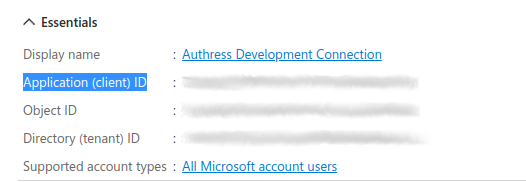
App Client Configuration
Now that the App is created in Azure we can copy the Client ID from the portal and store it in Authress:
App Client Secret
The next step is to generate the App Client Secret. To do that click Add a certificate or secret in the Azure Portal (If you have already done this the hyperlink may say 0 certificate, N secret, click that instead.):

Then click New client secret, enter a useful description and an Expiry date, and then copy the Secret Value (not the secret ID) back to the Authress Connection:
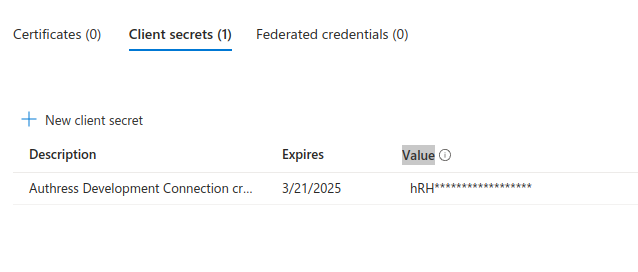
One interesting thing to note is that the these secrets have a max expiry date two years in the future. However, this validation is only present in the UI, the API actually supports significantly longer. Since Authress will inform you if you need to rotate this secret, requesting a longer expiry, often provides a more robust experience for your users, since you won't have to set yourself a reminder to rotate the secret every two years.
Validate the configuration
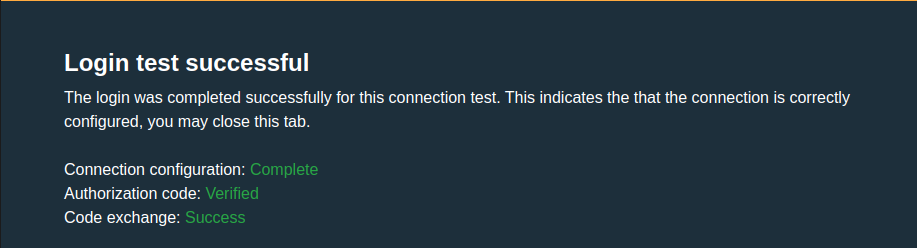
Now the setup is complete and you are ready to test connection. You can test the connection in the Authress Connection configuration by clicking Test Connection:
When everything is configured correctly you'll see the test login success screen:
[Optional] Verifying your publisher ownership
Microsoft has one last optional step that you can take later to create an Microsoft Partner Network Publisher that can be attached to your Azure AD (Entra) registration. The details of doing this are available in the MPN publishing setup guide in the Azure documentation.