Custom Login Flow
This guide details how to set up a passwordless flow. The same flow can be used to configure users to log in with an email address, a phone number, a one time use code, or any other custom flow you might have. You use Authress to generate a login url, then forward the user to that url via any mechanism that you might prefer. Authress supports this via an Authress Service Client has the permission to create tokens via a custom connection configuration.
Background: The Authress login flow
The standard Authress login flow, starts in your web app. The user requests to login, which generates a login request using one of your configured Authress connections. The connectionId and applicationId are passed to the login SDK. This is a similar flow to what your application is already using to login with Authress, As a reminder these are the relevant SDK methods:
import { LoginClient } from '@authress/login';
const loginClient = new LoginClient({
  // Both of these properties can be found and configured at:
  // https://authress.io/app/#/manage?focus=applications
  authressApiUrl: 'https://auth.yourdomain.com',
  applicationId: 'YOUR_APPLICATION_ID'
});

// Instead of `authenticate()` we'll use `authenticateWithOneTimeCode()` instead:
await loginClient.authenticateWithOneTimeCode({ serviceClientId: 'SERVICE_CLIENT_ID' });
Setup
The entire flow will look like this:
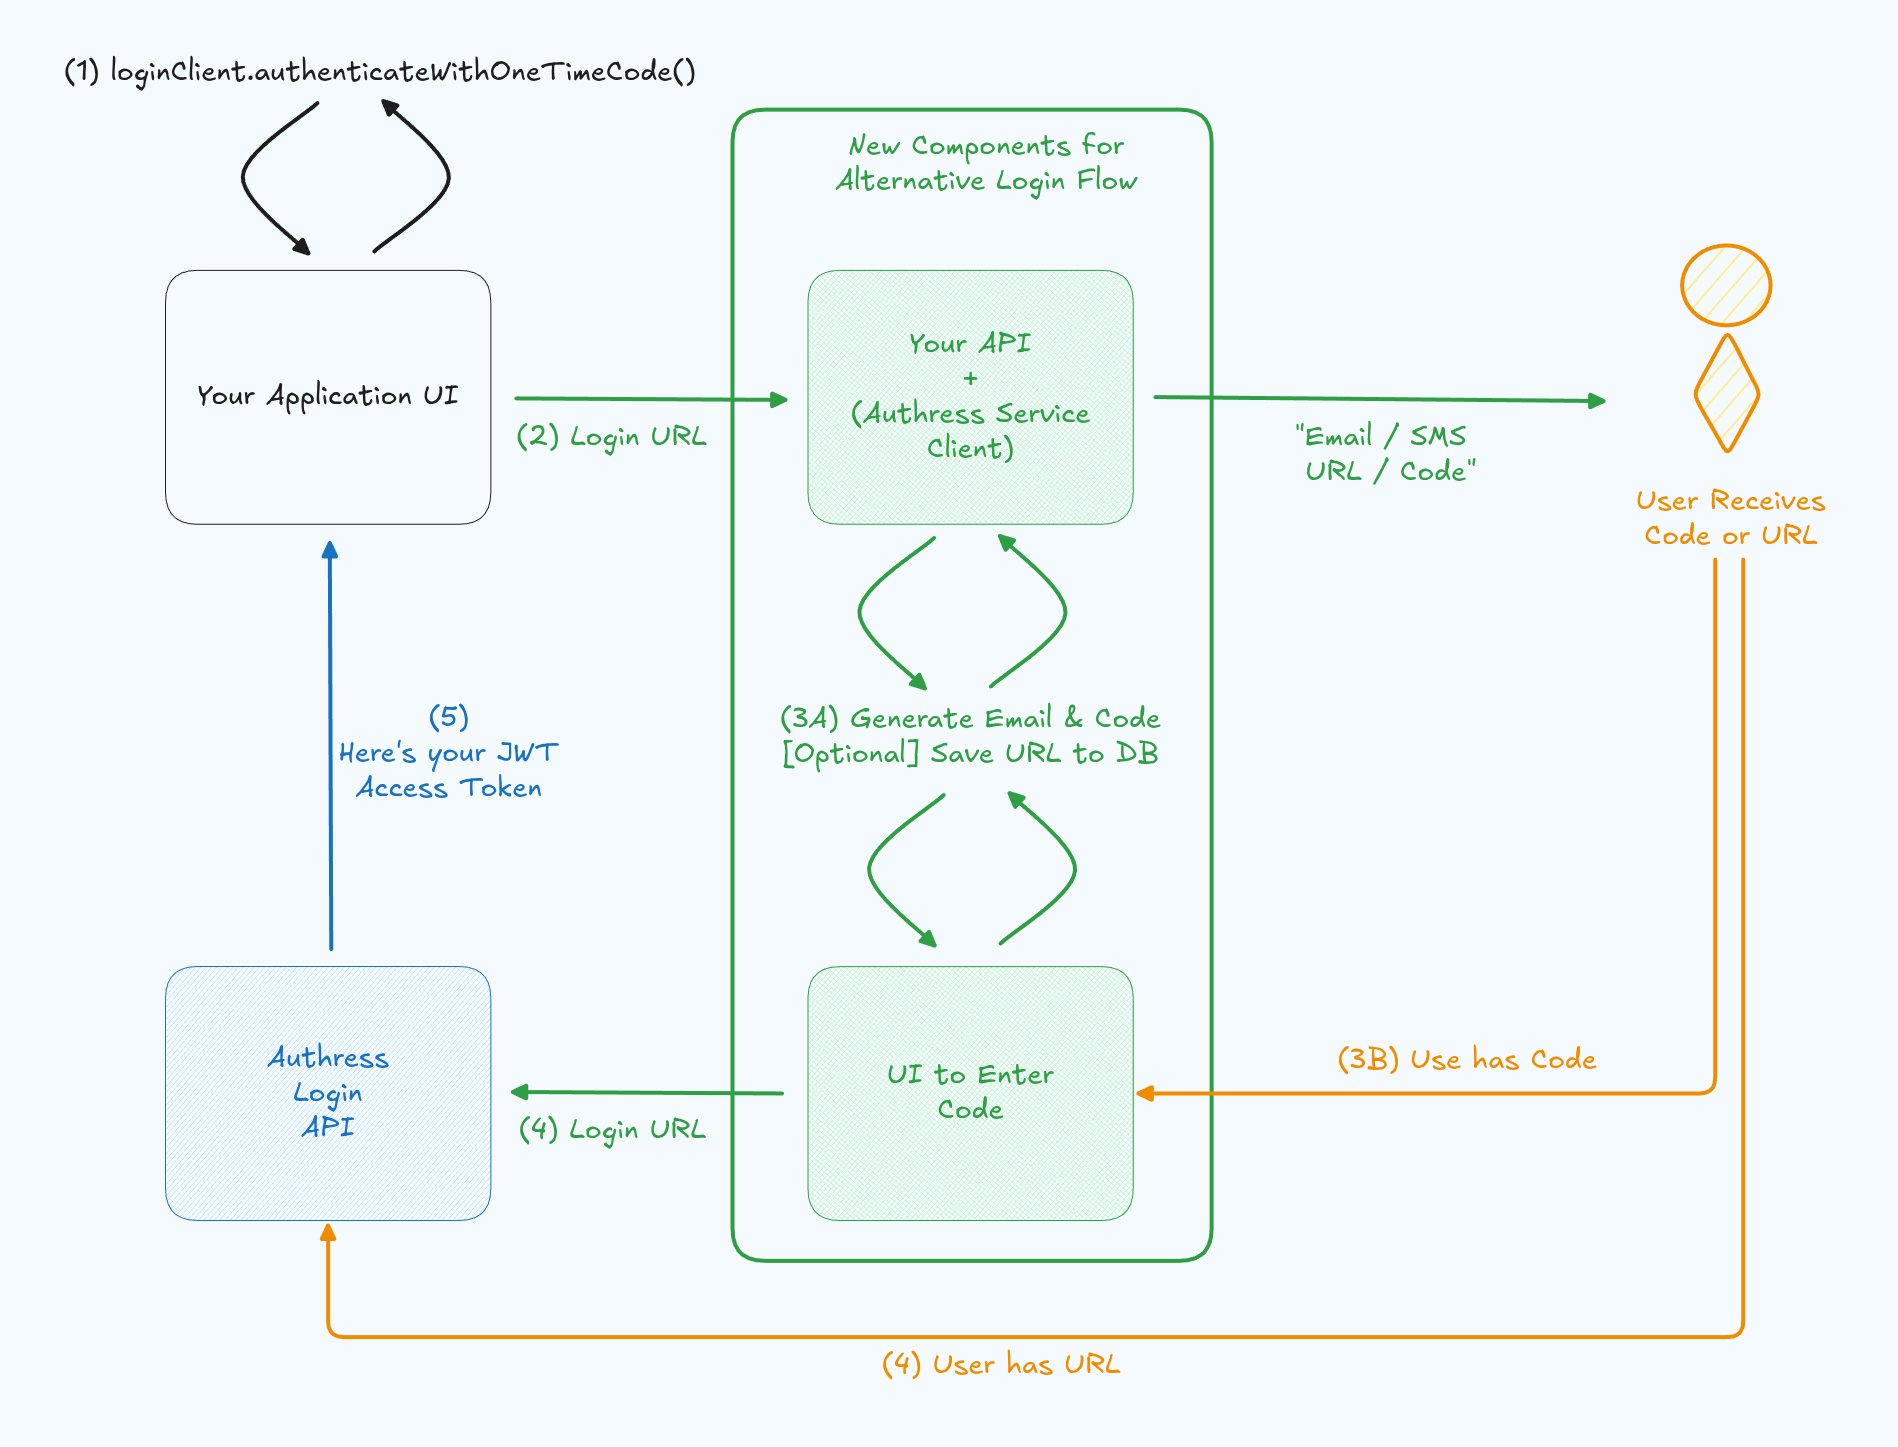
1. Enable the Custom Passwordless Login Flow
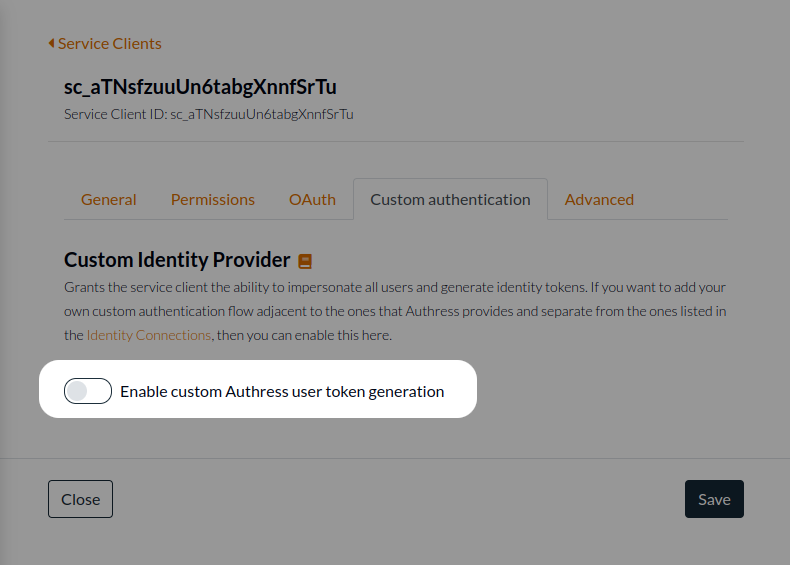
The first step is to create a new service client. This client will be given the permissions to start and complete the flow. This prevents malicious users from abusing your passwordless flow to hijack user accounts.
Generate a new Authress Service Client. Enter a name for the client, and select the option to Enable custom Authress user token generation. This allows this client to directly communicate with the Authress login API to request user identity tokens.
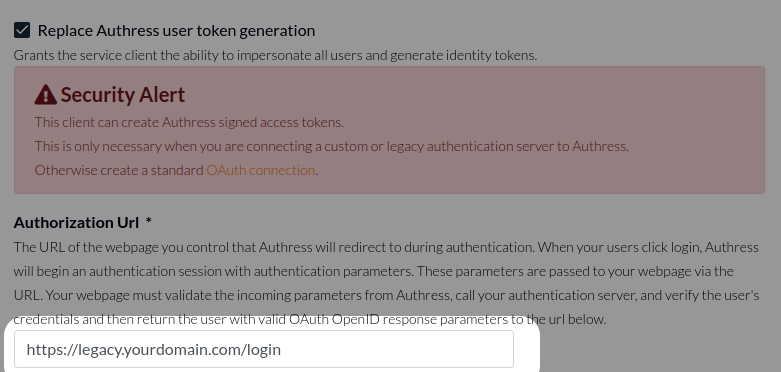
Your Service Client represents your API that will send the passwordless one time code to the user's email or a code to their phone number. Enter the API's endpoint in the Authorization Url property:
2. Update your application code
After the custom service client is created with the appropriate configuration, the next step is to update your application to enable the custom login flow. Instead of calling the authenticate() method, instead call the authenticateWithOneTimeCode() passing in the required properties:
import { LoginClient } from '@authress/login';
const loginClient = new LoginClient({
  // Both of these properties can be found and configured at:
  // https://authress.io/app/#/manage?focus=applications
  authressApiUrl: 'https://auth.yourdomain.com',
  applicationId: 'YOUR_APPLICATION_ID'
});

// This will redirect the user to the specified connection login UI,
// track their session with Authress, and then redirect back to your specified
const redirectUrl = window.location.href;
const result = await loginClient.authenticateWithOneTimeCode({ connectionId: 'SERVICE_CLIENT_ID', redirectUrl });

// Next call your passwordless service client receiver with the necessary properties.
// The name `generateUserLoginUrlAndSendEmail` is up to you, for this example we've used it for clarity.
await myApi.generateUserLoginUrlAndSendEmail({
  emailAddress: 'user@email.company.com',
  authenticationRequestId: result.authenticationRequestId,
  redirectUrl
});
3. Create your receiver
At this point have the user's intent to login (the authenticationRequestId) and the user's email are available. Now it is time to send the email and wait for the user to click the link.
Create your endpoint to generate the Authress one time code assertion, and send to the user:
import { ServiceClientTokenProvider } from '@authress/sdk';

/**
 * authenticationRequestId {string} - This value is returned by the Authress Login SDK when calling the authenticateWithOneTimeCode
 * redirectUrl {string} - The redirectUrl is the same one passed to the Authress Login SDK. This must be the same value.
 */
function generateUserLoginUrlAndSendEmail({ authenticationRequestId, redirectUrl, emailAddress }) {
    const serviceClientId = 'SERVICE_CLIENT_ID';
    const accessKey = 'SERVICE_CLIENT_ACCESS_KEY';

    const tokenProvider = new ServiceClientTokenProvider(accessKey);
    const authressLoginUrl = await tokenProvider.generateUserLoginUrl(redirectUrl, authenticationRequestId, serviceClientId, emailAddress.toLowerCase());
    await sendEmailToUserEmail(emailAddress, authressLoginUrl);
}
3B. Using a code instead of the URL
When using the email, Authress knows which user maps to that verified email address and can directly complete login using that URL.
If you want to send a code to an email, generate the code, and store a mapping in your database between the login URL and that code. Then display a screen to the user where they can enter the code. When the user receives your email with the code, they can enter it and receive back the login URL to complete login.
If you want to additionally use a phone number with a code, Authress doesn't know about phone numbers. The initial first step will be to save a mapping in your application for the user's phone number and map that to their email. When the user enters their phone number, send them SMS with the code, as before, complete the steps as above.
4. Authentication complete
When the user clicks on the link, they'll be logged into Authress, and be redirected back to the redirectUrl you specified in the previous step.
[Optional] Automatic connection linking
When a user logs in Authress supports automatically linking the current login connection with other login connections if:
- Both identity provider connections are set to enable
Automatic Linking - Both generate user identities contain the
email_verified: trueproperty.
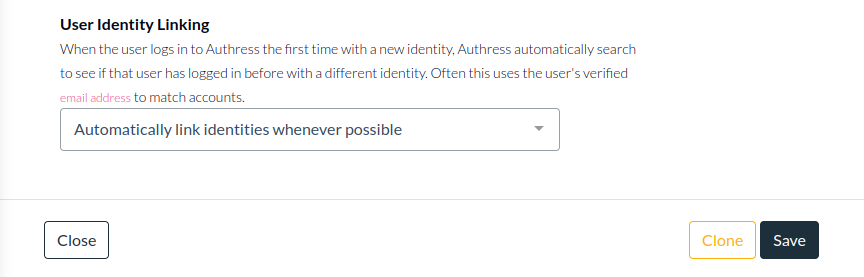
To enable Automatic Linking for both connections, go to Authress > Identity Connections > Select the connection > Advanced Tab > User Identity Linking. And then select: Automatically link identities whenever possible:
Second, Authress will validate that the user identity that is returned from the provider has a trusted contact data. Not all providers return a contact email, and not all emails nor providers are trustworthy. If the provider is trusted via (1) above, and that the provider trusts the contact data from the user, usually the email address, then the user will automatically logged in with their already existing user identity.
As an example, if:
- A user logged in Google previously
- Google set the
email_verifiedproperty totrue - The Authress preconfigured Google connection is set to enable Automatic Linking
And then the user logs into a second connection, such as your custom passwordless or another preconfigured connection AND:
- That connection has Automatic Linking enabled
- The user identity return from the provider includes the
email_verifiedproperty set totrue(This value is automatically set by the Authress SDKs.)
Then the user will automatically be logged in with their previous user identity and the user ID assigned to the user will be the same.
If either connection is set to Explicit Linking or if either connection does not have the email_verified attribute, then users can be linked using the Linking User Identity strategy guide.