Setup user authentication with Google
This article provides a quick start guide for adding Google Login to Authress, so that your users can use Google Login to authenticate into your software.
If you are looking to enable admin login access into the Authress Management Portal using your corporate IdP see the Authress Management Portal SSO Configuration.
In this guide we’ll use Google login as an example of how to connect. Setting up authentication requires the following parts:
- Authress-Google OAuth configuration
- New application setup
- Testing the configuration
Google OAuth configuration
- Prerequisite: You will need a Google Developer account
Select the first login provider you wish to integrate. For this example we’ll pick Google.

- Enable the Google preconfigured connection.
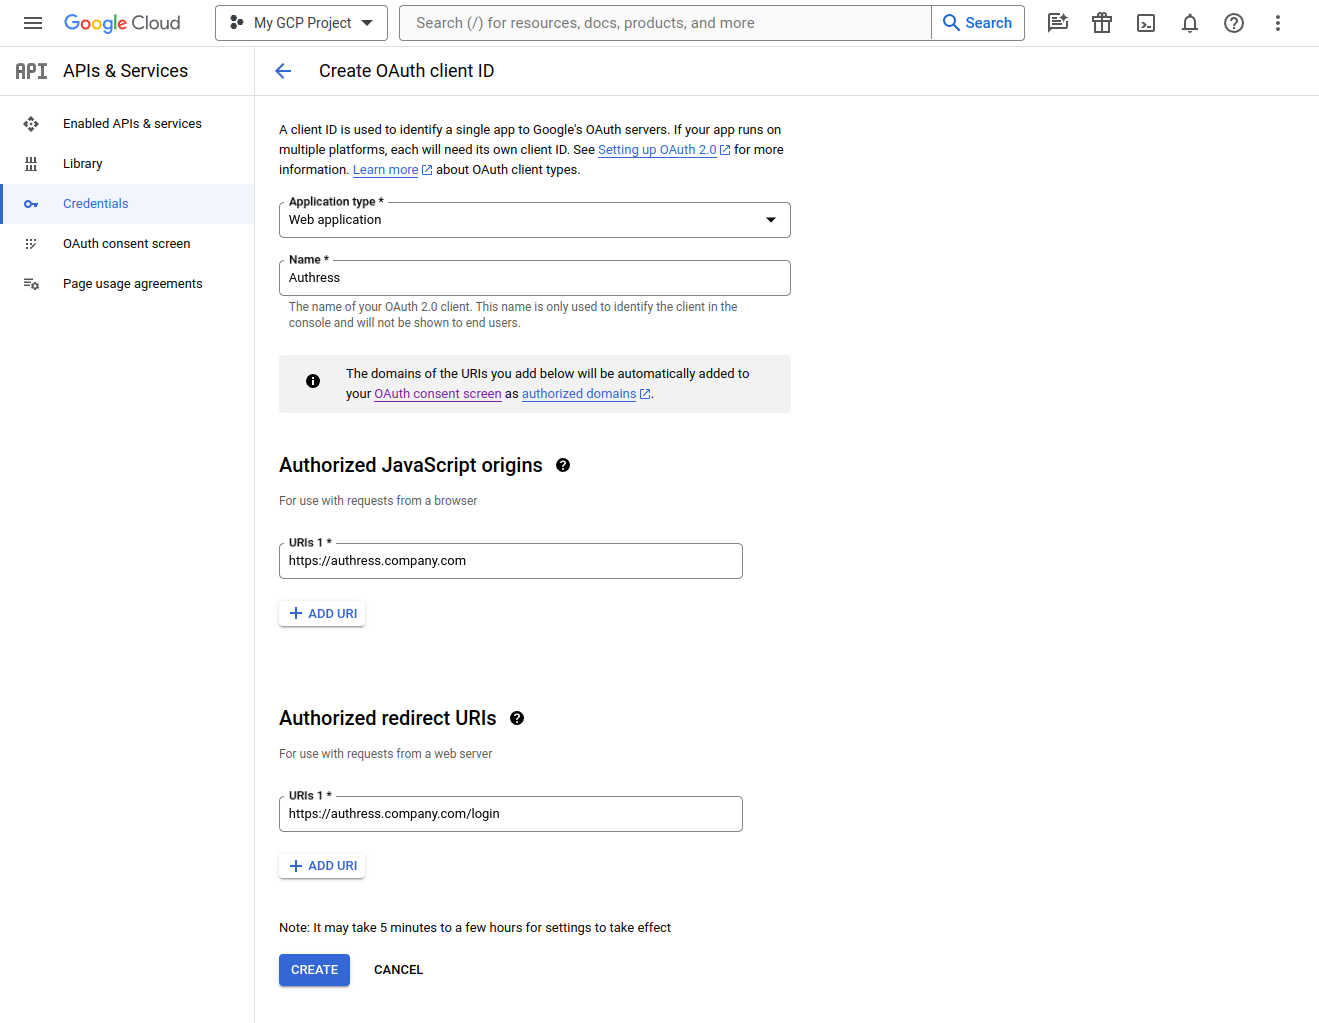
- Navigate to the Google Cloud Platform and create a new OAuth client ID. (Note: you will already need an existing GCP project for this to work. If you don't have one, you can create one now. They are free.)

Specify the Application type to be
Web Application, and specify the Name to beAuthress.Then add the following based on your Authress Custom Domain, replacing the auth.yourdomain.com below with your custom domain:
infoIf you aren't sure what your Authress Custom Domain is, checkout your Custom Domain configuration in the Authress Management Portal.
- Authorized Javascript origins: https://auth.yourdomain.com
- Authorized redirect URIs: https://auth.yourdomain.com/login
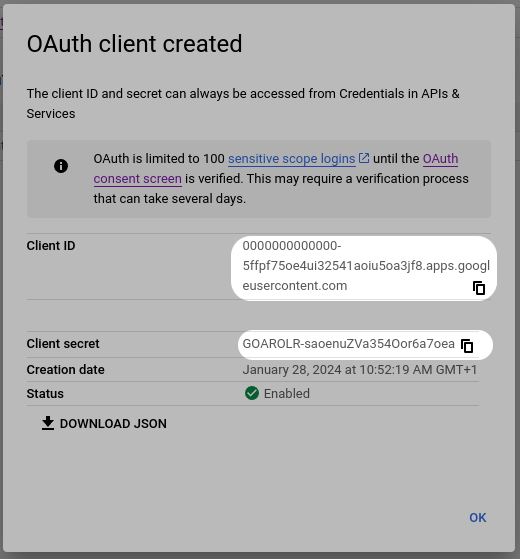
- Obtain the OAuth Client ID and Client Secret from your Google Developer dashboard.
- Paste the Client ID and Client Secret from Google to your Authress Connection
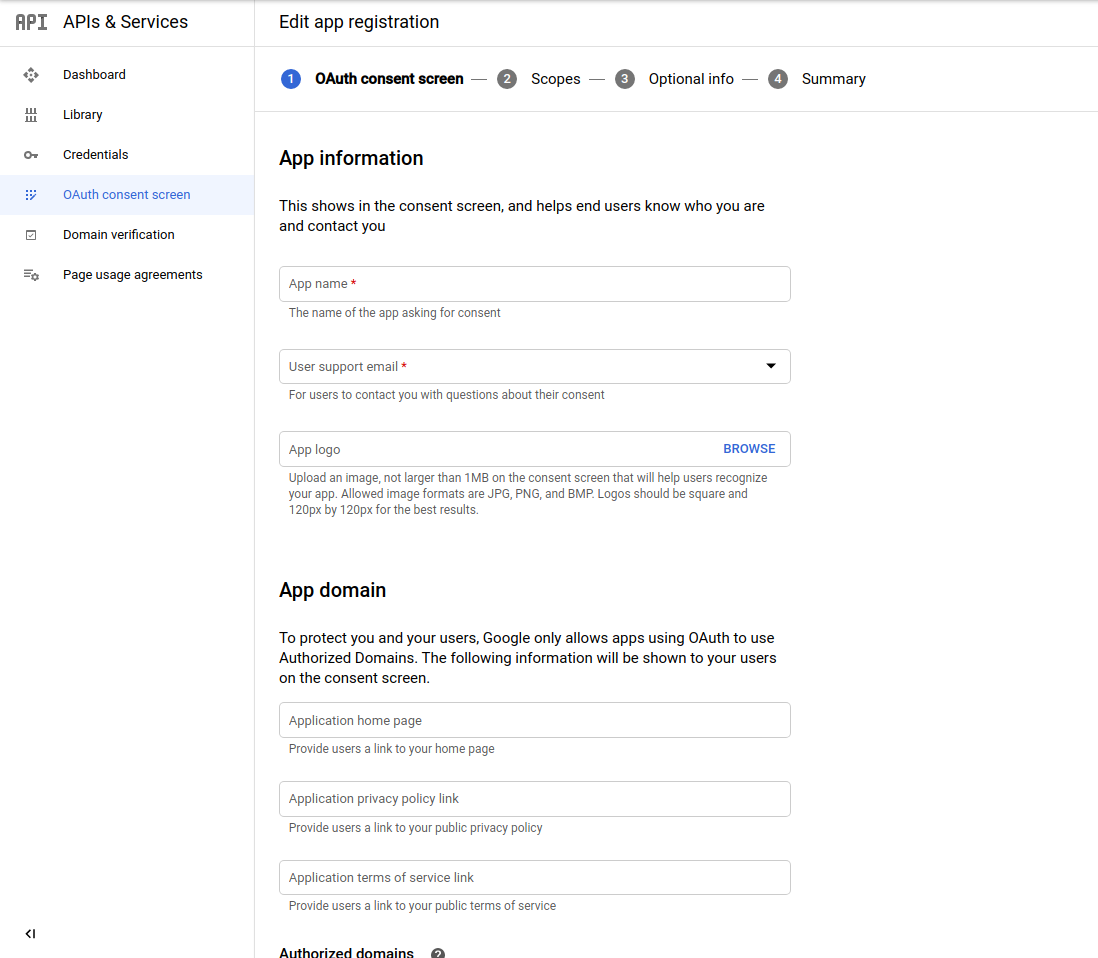
- [Optional] Update the OAuth consent screen with your application’s information.
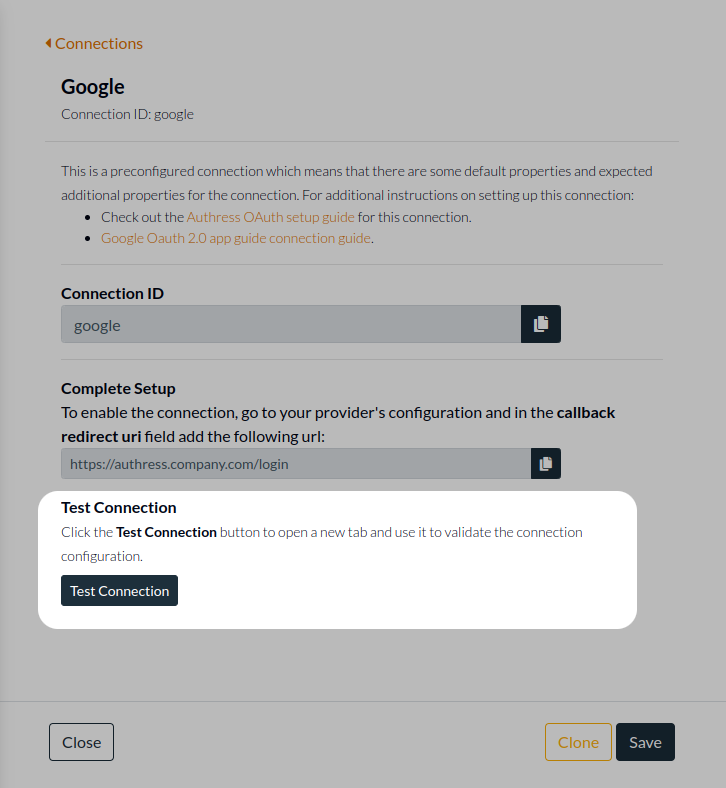
Validate the configuration
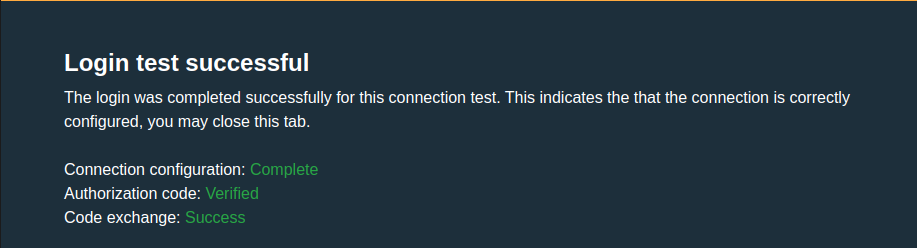
Now the setup is complete and you are ready to test connection. You can test the connection in the Authress Connection configuration by clicking Test Connection:
When everything is configured correctly you'll see the test login success screen:
Troubleshooting
When using this connection you might experience issues on the Google side due to the complex nature of their configuration and flow. Please see the following for resolutions to common issues.
Missing Offline Scopes
Getting offline scopes to be provided for a Google Refresh Token can be a challenge. Often you might see that even after updating the scopes being passed to Authress, the offline token you are getting back does not contain the scopes. Authress isn't overriding the scopes here, but instead Google is explicitly not providing them.
What happens is that Google only generates a Refresh token the first time a user logs in, after that, no new refresh token is created. That means that only the scopes that were initially added included in the refresh token. There are a number of ways around this however, during testing the best solution if you run into a problem is to reset your Google approved scopes for your user.
Remediation Steps:
- Navigate to your Google Account Applications.
- Find the application that you are developing and edit it.
- Remove the application from your Google account:
- Then attempt to log in again.

It's important to remember that Google may not always return the necessary refresh token, in these cases, be sure to follow closely the Google login OAuth client setup and use the following connectionProperties as strictly documented here:
import { LoginClient } from '@authress/login';

const loginClient = new LoginClient({
    authressApiUrl: 'https://auth.yourdomain.com',
    applicationId: 'Application_ID' });

await loginClient.authenticate({ connectionId: 'google',
    // For Google login, offline access is configured via `access_type` property
    // https://developers.google.com/identity/protocols/oauth2/web-server#offline
    connectionProperties: {
      scope: 'email openid profile additional_google_scope',
      access_type: 'offline',
      // Refresh token still missing, add this line:
      prompt: 'select_account consent'
    }
});