Creating low-code user management and login box customizations
Authress provides an automatically configured login box for your users to log in. This login box can be customized. For details on what can be customized see the Authentication Login Box customization and what is supported. To start customizing your login box, jump to the Authress Management Portal for Login Box Styles.
The Authress default login box looks like this:
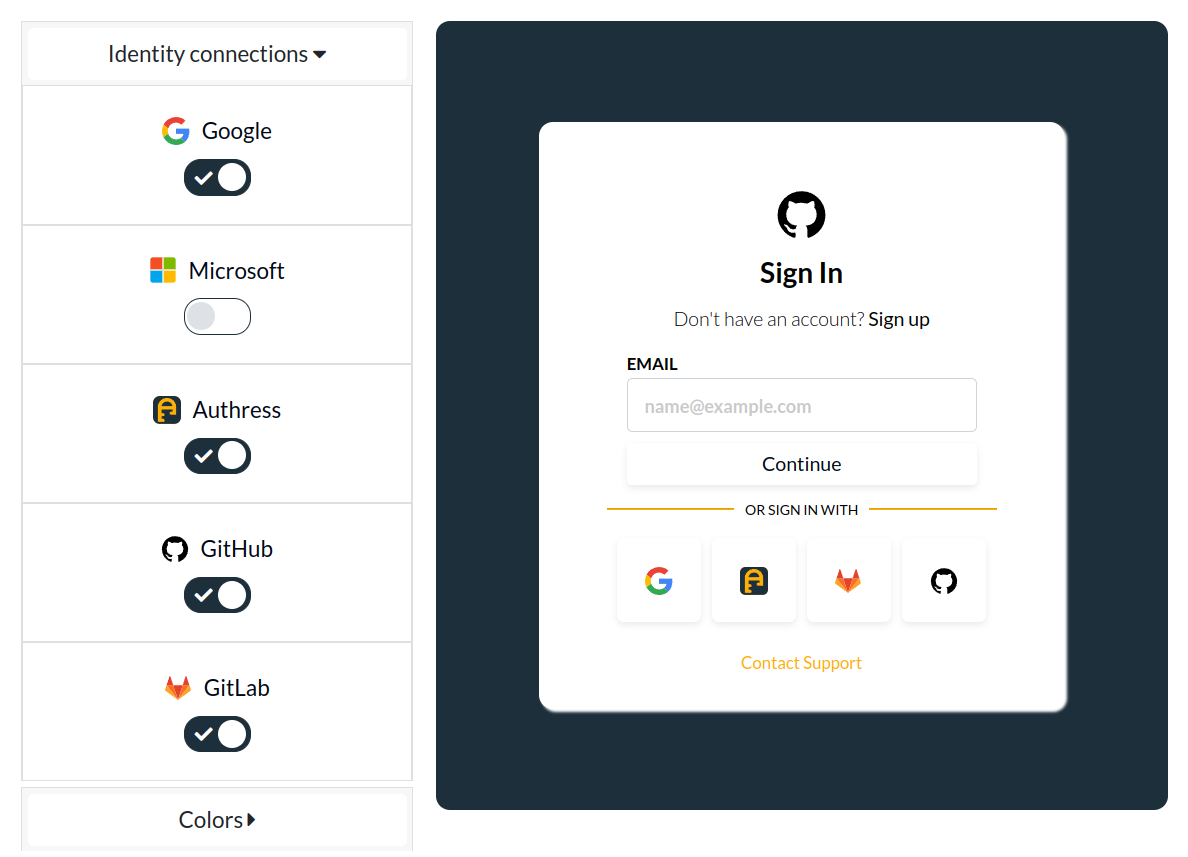
You can use the configuration in the Authress Management portal to control:
- Enable users to login in any number of applications, the portal is not bound to a single application.
- The branding to match your brand styles
- Customized support links
- The displayed federated connections
- Include Authress Federation login
- Include SSO or email authentication
Building your own login page
In some cases you might have more significant needs that are specialized to your exact use case. While the Authress login box scales to as many users, applications, or customers you have, there can be a case you want to configure it further.
A common scenario that requires the need for this is if you want to use a custom authentication flow that isn't OAuth 2 compliant or if you want to include a more complex onboarding flow with a login box hosted on a domain you own that all your applications will use to log in.
Example scenario
For the rest of this article we will assume the following configuration:
- Multiple website, mobile, or desktop applications are registered with Authress, we'll call these apps
app_001,app_002, andapp_003. Each application in your software should be registered as a separate application. - You would like to have a legacy or custom authentication flow that allows your users or users from another service you are running to log using Authress
- A custom onboarding flow to validate users before letting them log in.
Application login
The most common scenarios do not require #2 or #3. In this case, each of your applications would directly call the @authress/login SDK method authenticate() to log users in. Each application could either redirect to the Authress hosted login page or your applications could provide their own login buttons which are then passe to the authenticate() method in the Authress Login SDK.
Self-Hosted login UI
If the Authress managed login box is not sufficient for your use case, you can create your own self-hosted login UI.
The first step is to create your UI. The UI should support whichever Identity Connections make sense for your use case. The goal of this UI is to let the user pick which Connection they would like to use to login.
Your users will land on your UI, when they click the login button in your applications.
The flow is:
- User navigates to
app_001. - User clicks login in
app_001, then callsAuthress.LoginClient.authenticate(). - Authress redirects the user to your custom login UI.
- The login UI asks the user which connection they would like to use.
- The login UI calls the
Authress.LoginClient.updateExtensionAuthenticationRequest()passing in the parameters from Authress as well as the user's choice. - The SDK will redirect the user to complete login.
- After login is complete, the user will be returned to
app_001.
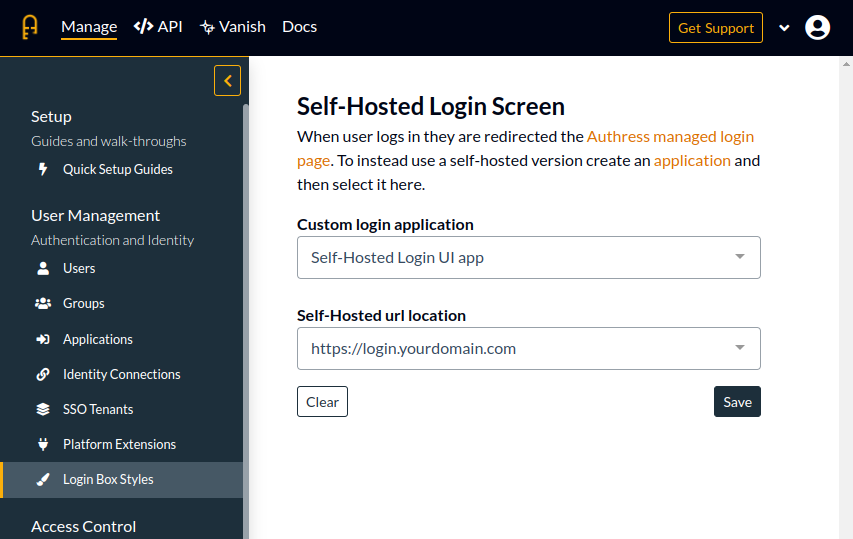
To inform Authress that you would like to use your own UI for authentication, in the Authress Management Portal for, create a new application. Then navigate to the Login Box Styles and set your application as the login UI. And because we are registering a new Authress Application, you will receive a new application ID for this example we will assume the generated ID is app_self_hosted_ui.
Non-OAuth login flow
In the case you have a legacy or custom authentication flow you want to use, you can configure it by creating a new Authress service client and following the custom connection configuration.
Once the custom authentication configuration for the Authress service client is completed, in your self-hosted login UI, you can pass the serviceClientId as the connectionId when the user logs in.
The logic of your user applications does not change, as before:
import { LoginClient } from '@authress/login';

const loginClient = new LoginClient({
    authressApiUrl: 'https://auth.yourdomain.com',
    applicationId: 'app_001'
});

// This will automatically redirect the user to the
await loginClient.authenticate();
And the configuration for the Self-hosted portal for the user to select their connection would look like this:
import { LoginClient } from '@authress/login';
const loginClient = new LoginClient({
    authressApiUrl: 'https://auth.yourdomain.com',
    // app_self_hosted_ui is our custom Self-Hosted Login UI, so it is specified here
    applicationId: 'app_self_hosted_ui'
});

await loginClient.updateExtensionAuthenticationRequest({
    // User selected
    connectionId: 'google'
});
In the case where the user selects your service client custom authentication
import { LoginClient } from '@authress/login';
const loginClient = new LoginClient({
    authressApiUrl: 'https://auth.yourdomain.com',
    // app_self_hosted_ui is our custom Self-Hosted Login UI, so it is specified here
    applicationId: 'app_self_hosted_ui'
});

const authenticationResult = await loginClient.updateExtensionAuthenticationRequest({
    connectionId: 'sc_service_client'
});

// Handle the custom flow, if there is a separate UI to complete the flow, then redirect the user there.
window.location.assign(authenticationRequest.authenticationUrl);
Or if this UI can complete the flow by itself, then instead pass the response to your secure service client.
import { ServiceClientTokenProvider } from '@authress/sdk';

const userId = await determineWhoTheUserIsAndDiscoverTheUserId();

const serviceClientTokenProvider = new ServiceClientTokenProvider(serviceClientAccessKey);
const redirectUrl = await serviceClientTokenProvider.generateUserLoginUrl(authenticationRequest, userId);
// Redirect the user to this result to complete authentication.
return redirectUrl;
This code requires the ServiceClient SDK Access Key, that means it must be executed on your service side in a secure compute environment and not on the client side browser.